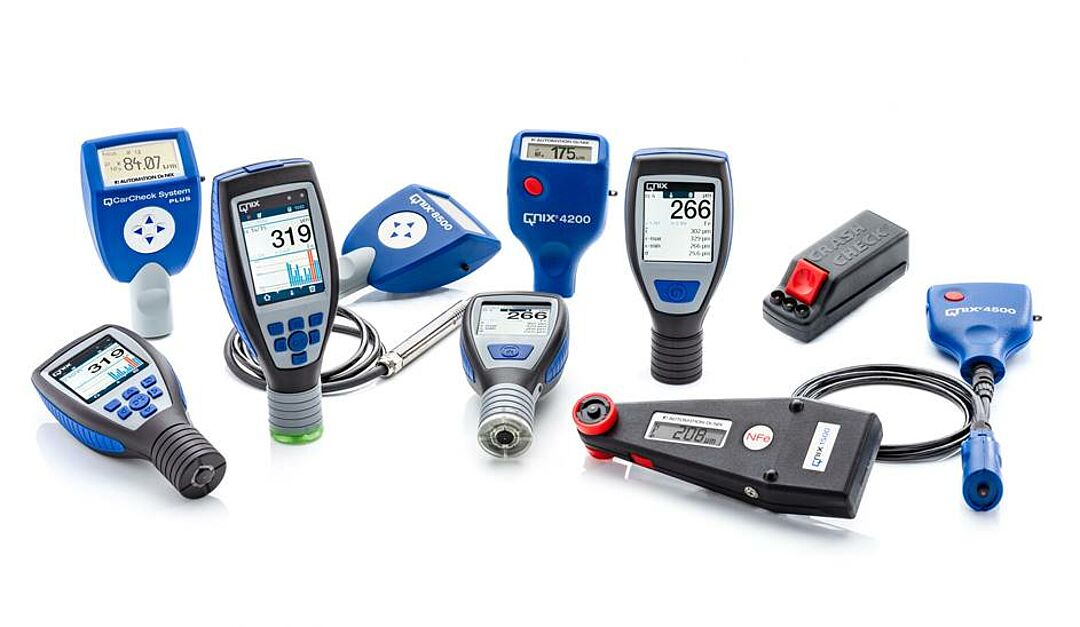
Coating thickness gauge for non-destructive measurement - the QNix® series

What you as a user should know about coating thickness measurement and QNix® measuring devices

With its QNix® brand and a wide range of products, Automation Dr. Nix always offers the right coating thickness gauge for precise, non-destructive measurement of coatings in a wide variety of industries. We can look back on decades of experience in heavy-duty corrosion protection, industrial painting and contract coating, surface finishing with electroplating and anodizing, vehicle valuation and bodywork construction.

Table of contents of this page

Our range

Coating thickness gauge for coating control on metal
Robust and precise, for valid measurement results, even under harsh conditions

Coating thickness gauge for focusing on the essentials; robust and precise

Our recommendation for heavy-duty corrosion protection, industrial painting and vehicle valuation

Proven and compact

Our best-selling coating thickness gauge for the painting and automotive sector

Classic coating knife with automatic on/off and one-handed operation

Very popular with vehicle experts, especially proven for larger measuring areas

How a coating thickness gauge from the QNix® series focuses on accuracy

Every coating thickness gauge in the QNix® series has a high level of accuracy. To ensure the accuracy of the measurement and the measuring range, we use rubies as measuring tips for our measuring devices and probes. With a Mohs hardness of 9, ruby is one of the hardest materials of all – only diamonds are harder. In addition, the surface of the ruby is polished to prevent damage to decorative coatings, for example.

With the “easy-to-use principle”, the focus of our measuring devices is on uncomplicated handling: all QNix® coating thickness gauges are always ready for immediate use. In most applications, they only require adjustment (calibration) on the base material – simply place, measure and read. The QNix® series can be used for a wide range of different coating materials and substrates. By working closely with our customers, we are able to take into account the specific requirements of different industries when further developing our coating thickness gauges.

All devices are developed and produced by Automation Dr. Nix at its headquarters in Germany – they are created with the typical “Made in Germany” thoroughness. The accuracy and precision of every measuring device that leaves our company is individually tested – making us a reliable partner in coating thickness measurement:

  • Each coating thickness gauge is automatically subjected to an individual factory calibration.
  • We then test each measuring device for accuracy and precision in our calibration laboratory and issue a test certificate.

In this way, we ensure that every coating thickness gauge that leaves our company meets the tight tolerance specifications.

Automation Dr. Nix has internalized this mentality and thoroughness. We are pleased that we can produce good, high-quality products in Germany.

Why is it important to distinguish between correctness, precision and accuracy? Quite simply, the systematic error of a measuring system (the accuracy) can be determined and documented by calibration. The accuracy can be improved by adjustment. The random error (precision) cannot be improved. If the precision is poor, the probability that a single measured value is close to the mean value of many individual measured values is low. This means that poor precision can only be countered by a larger number of individual measurements – and this costs the user time.

Every coating thickness gauge in the QNix® series has a high measuring accuracy. The accuracy and precision of every measuring device that leaves our company is individually tested – making us a reliable partner in coating thickness measurement.

The QNix® series can be used for a wide range of different coating materials and substrates. Automation Dr. Nix develops and produces all QNix® series at its headquarters in Germany. It is created according to the typical “Made-in-Germany thoroughness”. Automation Dr. Nix has internalized this mentality. We are pleased that we can produce good, high-quality products in Germany.

Do you have technical, application or product-related questions about coating thickness measurement?

Read on, use our support form or give us a call – we will be happy to advise you: +49 (0)221 91 74 55-0

Non-destructive coating thickness measurement on metallic substrates

Non-destructive, tactile coating thickness measurement on metallic substrates can be roughly divided into two measurement methods:

  • Measurement on ferromagnetic substrate, for example on iron or steel: The substrate type and the associated measurement mode are usually referred to as Fe for short. Processes that make use of magnetic induction are used. A magnetic field is generated by a permanent or electromagnet and measured with a Hall sensor (electro or permanent magnet possible) or a secondary coil (only electromagnets).
  • Measurement on non-ferromagnetic or non-ferrimagnetic, but electrically conductive substrates; for example on aluminum, zinc, copper, brass and certain types of stainless steel: This type of substrate and the associated measurement mode are designated NFe. The eddy current process is used for these layers.

QNix® offers a wide range of coating thickness gauges and probes for many applications. All common measurement methods are used:

  • Magnetic induction with electromagnet and measurement with secondary coil (magneto-inductive measurement method) – DIN EN ISO 2178
  • Magnetic induction with electromagnet and measurement with Hall sensor – DIN EN ISO 2178
  • Magnetic induction with permanent magnet and measurement with Hall sensor – DIN EN ISO 2178
  • Eddy current method – DIN EN ISO 2360

What is the base material?

The base material or substrate of the metallic coating carrier, for example, is not always clearly visible or quickly recognizable during vehicle evaluation. This is why QNix® coating thickness gauges automatically apply the correct measuring method in each case. In the automotive sector in particular, more and more body parts are being made from aluminum. Many users work under time pressure and cannot test the base material in detail before measuring. QNix® coating thickness gauges support the user by recognizing which underlying metal (or metal substrate) is involved. If a coating thickness gauge detects steel or iron (Fe) as a coating carrier, it uses the magnetic field change method in accordance with DIN EN ISO 2808. If the device registers non-ferrous metals (NFe) as the base material, it triggers the measurement of the coating thickness using the eddy current method in accordance with DIN EN ISO 2178.

On the one hand, coatings of non-magnetic but electrically conductive layers or metals such as chromium, zinc or tin on magnetic base materials such as steel or iron (Fe) can be determined. In addition, users can also determine the thickness of electrically insulating layers of anodized or painted coatings on non-ferromagnetic but electrically conductive base materials such as aluminium (NFe).

These include, for example

  • Aluminum (for example in aircraft construction and in frame and body construction for motorcycle and car manufacturers)
  • Stainless steel
  • Copper (for example in pipe systems)
  • Magnesium
  • Zinc (for example the coating of hot-dip galvanizing)

The coating can be made of many different materials. The thickness of the following sample surfaces can be measured non-destructively by our QNix® coating thickness gauges:

  • Anodized (thickness between approx. 8
    µ
    m – 20
    µ
    m)
  • Foils (approx. 260
    µ
    m)
  • Electroplated coatings (5
    µ
    m – 30
    µ
    m)
  • Corrosion protection coatings (from 120
    µ
    m)
  • Coatings (between 100
    µ
    m – 200
    µ
    m thick)
  • PTFE (known as Teflon coating in pans, for example) (approx. 100
    µ
    m)
  • Powder coatings (up to 150
    µ
    m)
  • Enamel coatings (for example enamel) (from 500
    µ
    m)

Using your coating thickness gauge correctly - what you should pay attention to when using it

Every coating thickness gauge is subject to a large number of error influences that affect the accuracy of the measurement result. The most important influencing factors are

  • Temperature changes,
  • the material properties of the base substrate,
  • the geometry of the measurement object.

High-quality coating thickness gauges have very good temperature compensation. Nevertheless, users should always check the accuracy of the results when measuring the coating thickness in the event of significant temperature fluctuations. This can be done, for example, with an uncoated substrate (the reference plate) and a calibration standard (the calibration foil). If the user detects unacceptable deviations in the measurement of the coating thickness, the measuring device should be adjusted.

In most cases, the material properties of the substrate can be compensated for by an adjustment (often also called calibration). Common are:

  • Zero point adjustment: standardization on the uncoated substrate
  • Single-point adjustment: Adjustment with a calibration standard of known thickness
  • Multi-point adjustment: Adjustment with several calibration standards of known thickness

As a first step, you can check whether the geometry of the measurement object – for example in the case of curvatures – has an influence on the measurement result by checking the manufacturer’s specifications in the data sheet. In borderline cases or if there is any doubt, the accuracy of the device must also be checked with calibration standards on the uncoated substrate and adjusted if necessary.

With the measuring technology used by QNix® and the factory calibration determined individually for each probe and stored in the coating thickness gauge, you can achieve a high degree of accuracy of the measured values in most cases simply by zero-point adjustment (normalization) on the original substrate without coating. You can check these with calibration standards after zero point adjustment.

Important: To check or improve the accuracy of your coating thickness gauge, only use calibration standards whose tolerances you know and which have been certified by the manufacturer or a calibration laboratory.

Page 1Created with Sketch.

Are you interested in our coating thickness gauges?
We will be happy to send you a non-binding offer.